RJ11 connectors are commonly used for telephone and modem connections, featuring 4 or 6 pins. This guide provides essential insights for installing, troubleshooting, and understanding RJ11 wiring systems.
Overview of RJ11 Connectors
RJ11 connectors are standardized telephone jacks with 4 or 6 pins, commonly used for connecting telephones, modems, and fax machines. They support up to two phone lines, with red and green wires typically used for the primary line, and yellow and black for the secondary. The 4-pin version is sufficient for single-line setups, while the 6-pin accommodates dual lines. RJ11 connectors are compatible with Category 2 cable or higher, though Cat5e or above is recommended for better performance. Their compact design and color-coded wiring simplify installations, making them a reliable choice for telecommunication systems. Understanding RJ11 connectors is essential for troubleshooting and setting up phone or modem connections effectively.
Importance of RJ11 in Telecommunications
RJ11 connectors play a crucial role in telecommunications by enabling reliable connections for telephones, modems, and fax machines. Their standardized design ensures compatibility across various devices, simplifying installations and maintenance. RJ11 connectors support multiple phone lines, making them ideal for both residential and small office setups. Their durability and color-coded wiring reduce errors and downtime, ensuring consistent communication services. As a fundamental component in telecommunication systems, RJ11 connectors remain essential for providing stable and efficient voice and data transmission, even as technology evolves. Their widespread adoption underscores their importance in maintaining seamless connectivity in modern communication networks.
Purpose of the Guide
This guide is designed to provide a comprehensive understanding of RJ11 wiring, catering to both beginners and experienced technicians. It covers essential topics such as connector types, wiring techniques, and troubleshooting methods. The guide aims to simplify the process of installing and maintaining RJ11 connections, ensuring reliable communication systems. By following the step-by-step instructions and best practices outlined, readers can confidently handle RJ11 wiring projects. Whether upgrading existing infrastructure or setting up new installations, this guide serves as an invaluable resource for anyone seeking to master RJ11 wiring. It emphasizes safety, efficiency, and adherence to industry standards to ensure optimal results.
History and Evolution of RJ11
The RJ11 connector originated in the 1970s, initially used for telephone lines. Over time, it evolved to support modems and remains crucial in modern telecommunications and networking setups.
Origins of RJ11 Connectors
The RJ11 connector traces its roots to the 1970s, developed to standardize telephone connections. Initially designed for single-line phones, it quickly became the norm for home and office telecommunication systems. Its six-position, four-contact design allowed for straightforward installation and compatibility with basic telephone services. The connector’s simplicity and reliability made it a preferred choice for connecting landline telephones, modems, and fax machines. Over time, its versatility has ensured its continued relevance in modern networking, despite the rise of more advanced connectors like RJ45. The RJ11’s enduring presence is a testament to its practical design and adaptability in evolving communication needs.
Development Over Time
The RJ11 connector has evolved since its introduction in the 1970s, initially designed for single-line telephone connections. Over the years, it transitioned from 4-pin to 6-pin configurations, enhancing its ability to support multiple phone lines. This adaptation allowed it to remain relevant in environments requiring dual-line functionality. Despite the rise of digital communication, RJ11 connectors have maintained their utility in legacy systems and niche applications. Advances in materials and manufacturing have improved durability and resistance to signal interference, ensuring their continued reliability in modern networking scenarios. Their enduring presence underscores their adaptability and practicality in various communication setups.
Role in Modern Networking
Despite the prevalence of digital communication, RJ11 connectors retain a role in modern networking, particularly in legacy systems and specialized applications. They are widely used for connecting analog devices like fax machines, modems, and traditional landline phones. In some cases, RJ11 connectors are employed in home security systems and alarm panels, where reliable analog communication is essential. Their simplicity and compatibility with existing infrastructure make them a practical choice for certain niche networking needs. Additionally, RJ11 connectors are often used in industrial settings for older equipment that relies on analog communication. Their continued relevance highlights their enduring utility in specific modern applications.
Types of RJ11 Connectors
RJ11 connectors are available in 4-pin and 6-pin configurations, commonly used for telephone and modem connections. They differ from RJ45 connectors, which support higher data speeds for Ethernet.
4-Pin vs. 6-Pin RJ11 Connectors
RJ11 connectors are primarily available in 4-pin and 6-pin configurations. The 4-pin version is the standard for single-line telephone connections, using red and green wires for communication. The 6-pin connector supports two phone lines, adding yellow and black wires for the second line. Both types are compatible with RJ11 sockets, as the 4-pin can fit into a 6-pin jack. The choice between them depends on the number of phone lines needed. Understanding these differences is crucial for proper installation and connectivity in telecommunication systems. This guide will help you identify and use the appropriate connector for your specific requirements.
Applications of Different Types
The 4-pin RJ11 connector is ideal for single-line telephone connections, commonly used in residential settings and basic office phone systems. It supports standard voice communication, making it a reliable choice for simple installations. The 6-pin version, on the other hand, is designed for dual-line applications, such as homes or businesses requiring two phone lines. This versatility allows for simultaneous use of fax machines, modems, and telephones. Both types are widely used in legacy communication systems, though modern networking often favors RJ45 connectors for higher data speeds. Understanding the appropriate use of each type ensures efficient and effective connectivity for various telecommunication needs.
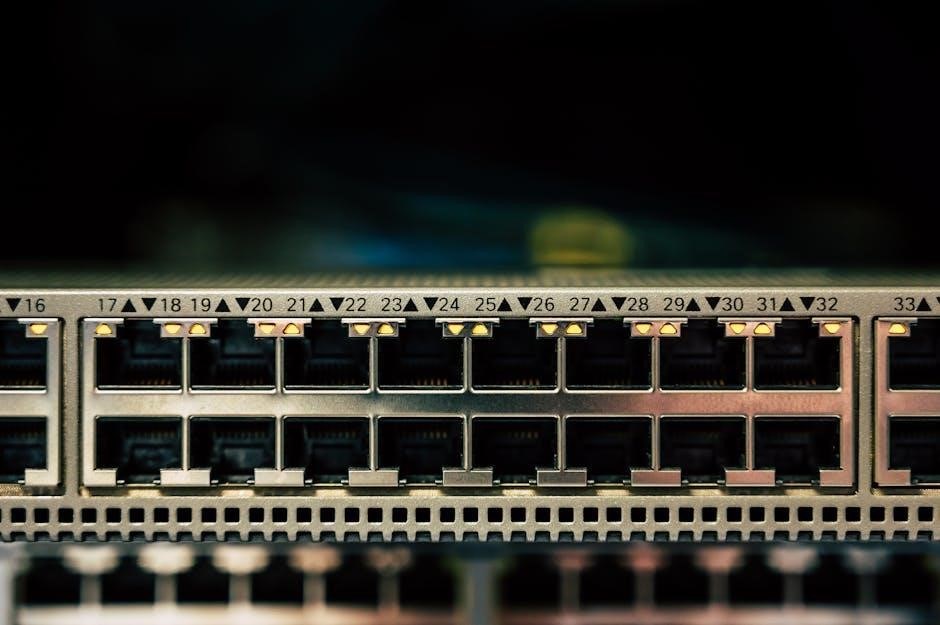
RJ11 vs. Other Connectors (RJ45)
RJ11 and RJ45 connectors differ significantly in design and functionality. RJ45, with its 8-pin configuration, supports higher data speeds and is the standard for Ethernet connections in modern networks. It is commonly used in local area networks (LANs) and internet connections, offering speeds up to 10Gbps. In contrast, RJ11 connectors, with 4 or 6 pins, are primarily used for telephone and dial-up modem connections, supporting voice communication at much lower data rates. While RJ45 is more versatile and widely adopted in today’s digital landscape, RJ11 remains relevant for legacy telephone systems and basic communication needs, making them suitable for different applications in both residential and commercial settings.
The RJ11 Wiring Process
The RJ11 wiring process involves preparing the cable, understanding wire color codes, following step-by-step instructions, and testing the connection to ensure reliability and proper functionality.
Preparing the Cable
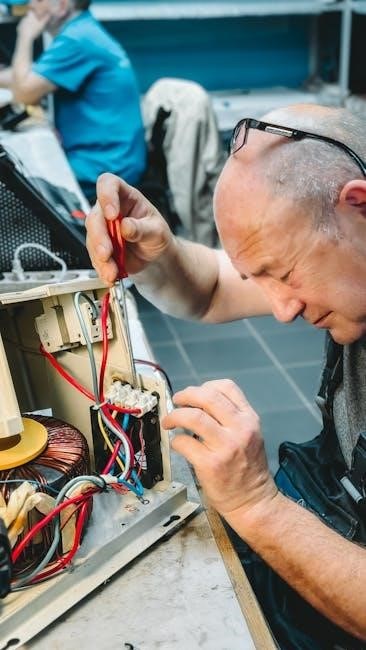
Preparing the cable is the first step in RJ11 wiring. Cut the cable to the desired length using cable cutters. Strip the outer insulation to expose the inner wires. For RJ11, typically use the red, green, yellow, and black wires. Arrange the wires according to the required configuration, ensuring they are properly aligned and trimmed. Use a wire stripper to remove insulation from the ends. Carefully handle the wires to avoid damage or tangles. Proper cable preparation ensures reliable connections and minimizes signal interference. Always use high-quality UTP or STP cables for optimal performance. This step is crucial for a successful wiring process.
Understanding Wire Color Coding
Wire color coding is essential for proper RJ11 wiring. Standard RJ11 connectors use four colors: red, green, yellow, and black. Red and green are typically used for the primary phone line, while yellow and black are for secondary lines or unused. The color coding helps in identifying the correct wires during installation. For example, red is often the “tip” and green the “ring” in telephone wiring. Understanding this coding ensures correct connections and avoids crossed wires. Always follow the T568A or T568B wiring standards for consistency. Proper color alignment is crucial for maintaining signal integrity and ensuring reliable communication. This step is vital for successful RJ11 wiring.
Step-by-Step Wiring Instructions
Start by preparing the cable, stripping 1-2 inches of the outer jacket. Identify the wires using color coding: red (tip) and green (ring) for primary lines. Insert the wires into the RJ11 connector, ensuring red is in position 1 and green in position 2. For secondary lines, use yellow (tip) and black (ring) in positions 3 and 4. Carefully crimp the connector to secure the wires. Use a crimping tool to ensure a tight connection. After wiring, test the connection with a cable tester to verify functionality. Properly label each cable for easy identification. This process ensures a reliable and efficient RJ11 connection.
Testing the Connection
After wiring, use an RJ11 cable tester to verify connectivity. Insert the connector into the tester’s jack and check for lights indicating proper wiring. Ensure there are no shorts or open circuits. For advanced testing, use a multimeter to measure resistance between pins. Set the multimeter to continuity mode to verify connections. If using a phone, plug the cable into a phone jack and test for dial tone. Proper testing ensures reliable communication and identifies any wiring errors. This step is crucial for maintaining signal integrity and ensuring the connection works as intended. Always test before final installation to avoid future issues.

Tools and Materials Needed
Essential tools include wire cutters, cable testers, and crimpers. Materials required are RJ11 connectors, UTP/STP cables, and patch panels. These ensure proper installation and testing of connections.
Essential Tools for RJ11 Wiring
Installing RJ11 connectors requires specific tools to ensure a reliable connection. Wire cutters are necessary for trimming excess cable, while a crimping tool securely attaches connectors. A cable tester helps verify connectivity and identify faults. Pliers may be needed for wire stripping, and a punch-down tool is useful for patch panels. Screwdrivers can assist with securing connectors to devices. A multimeter is optional but useful for advanced troubleshooting. These tools help maintain professionalism and efficiency during the wiring process, ensuring proper installation and minimizing errors.
Materials Required
For RJ11 wiring, essential materials include RJ11 connectors, available in 4-pin or 6-pin configurations. High-quality UTP (Unshielded Twisted Pair) or STP (Shielded Twisted Pair) cables are recommended. Wire strippers are needed for preparing cable ends. A cable tester ensures proper connectivity. Patch panels and wall jacks are necessary for installations. Mounting hardware like screws and brackets is required for securing components. These materials ensure a stable and reliable telephone or modem connection, supporting both voice and data transmission efficiently.
Choosing the Right Cable (UTP vs. STP)
When selecting cables for RJ11 wiring, the choice between UTP (Unshielded Twisted Pair) and STP (Shielded Twisted Pair) is crucial. UTP cables are cost-effective and suitable for most home and office environments, offering excellent performance for telephone and modem connections. STP cables, while more expensive, provide superior protection against electromagnetic interference, making them ideal for industrial or noisy settings. Consider the environment and desired performance when deciding. For standard installations, UTP is sufficient, but STP is recommended for environments with high interference. Both support voice and data transmission, ensuring reliable connectivity for your telecommunication needs.

Common Mistakes and Solutions
Common mistakes include incorrect wire color coding and improper connector termination. Solutions involve double-checking connections, using proper tools, and testing cables before installation to ensure reliability.
Mistakes in Wiring and Termination
Common wiring mistakes include incorrect wire color coding, improper connector termination, and mismatched pin assignments. For example, using the wrong wires for specific pins can lead to connectivity issues. Additionally, failing to follow T568A or T568B standards can cause signal interference. Physical mistakes, such as insufficiently stripping insulation or not seating wires properly in connectors, can result in poor connections. To avoid these errors, always refer to wiring diagrams and test connections with a cable tester before finalizing. Proper tools, like wire strippers and crimpers, ensure precise termination. Double-checking work before installation is essential for reliability and performance.
Solutions for Common Issues
To resolve wiring issues, start with thorough testing using a cable tester to identify faults. Replace faulty connectors or cables as needed. Ensure proper wire seating and crimping to avoid loose connections. For interference, switch to shielded twisted pair (STP) cables or install filters. If signal strength is weak, verify cable length and reduce it if necessary. Consult wiring diagrams for T568A or T568B standards to correct pin assignments. Regular maintenance and inspection can prevent recurring problems. Using high-quality tools and materials ensures reliable connections. Finally, seek professional assistance for persistent issues beyond basic troubleshooting to maintain optimal performance and avoid further complications.
Dealing with Interference
To minimize interference in RJ11 wiring, use shielded twisted pair (STP) cables, which provide better protection against electromagnetic noise. Ensure cables are properly insulated and routed away from power sources and high-frequency devices. Regularly inspect wires for damage or loose connections, as these can introduce signal degradation. Install filters or surge protectors to reduce electromagnetic interference (EMI). For environments with high interference, consider upgrading to Cat5e or higher cables, which are designed for better noise reduction. Properly twisting the wires in twisted pair cables can also help mitigate interference. By addressing these factors, you can ensure a stable and reliable connection for your telecommunication systems.
Troubleshooting RJ11 Connections
Troubleshooting RJ11 connections involves diagnosing issues like connectivity problems or physical damage. Test cables for faults, check wiring for correct pin configurations, and ensure all connectors are securely attached.
Diagnosing Connection Problems
Diagnosing RJ11 connection issues begins with checking for loose or damaged connectors. Ensure all cables are securely plugged in and inspect for physical damage. Use a cable tester to verify wiring continuity and identify faults. Check the wire color coding against the standard configuration to ensure proper connections. If issues persist, test the cable with a different device to isolate the problem. Common problems include incorrect wiring, faulty connectors, or signal interference. By systematically testing each component, you can pinpoint the root cause and resolve connectivity issues efficiently.
Testing Cables and Connectors
Testing RJ11 cables and connectors involves using a cable tester to verify wiring integrity. Start by visually inspecting for damage or bent pins. Plug the cable into the tester to check wire continuity and ensure proper connections. Refer to wire color coding standards like T568A or T568B for accurate configuration. If issues arise, test the cable with a different device to isolate the problem. Common faults include incorrect wiring or faulty connectors. By systematically testing each component, you can identify and resolve connectivity issues efficiently, ensuring reliable telephone and modem connections.
Identifying and Fixing Faults
Common faults in RJ11 wiring include incorrect wire connections, damaged cables, or faulty connectors. To identify issues, check for connectivity problems or interference. Verify wire color coding matches T568A or T568B standards. Replace damaged connectors or cables if necessary. For interference, consider shielding or re-routing cables. Ensure all connections are secure and properly seated. Regularly inspect cables for physical damage and test them with a cable tester. Addressing these issues promptly ensures reliable communication and prevents further complications. By following these steps, you can effectively troubleshoot and restore functionality to your RJ11 connections. Proper maintenance is key to maintaining optimal performance in telecommunication systems.

Safety Tips for Wiring
Always disconnect power before wiring. Use insulated tools to prevent electric shocks. Avoid overloading circuits and ensure proper cable management to prevent fires or damage.
Handling Cables and Connectors
Proper handling of RJ11 cables and connectors is crucial for maintaining signal integrity and preventing damage. Always grasp cables by the jacket rather than the wires to avoid internal stress. When bending cables, ensure the radius exceeds the manufacturer’s minimum recommendation to prevent breakage. Use cable ties or organizers to keep wires tidy and avoid tangles. For connectors, handle them by the housing rather than the pins to prevent damage or misalignment. Store cables in a cool, dry place away from direct sunlight to prevent degradation. Regularly inspect cables for signs of wear, such as frayed jackets or corroded pins, and replace them if necessary.
Electrical Safety Practices
When working with RJ11 wiring, prioritize electrical safety to prevent shocks or equipment damage. Always disconnect power sources before handling cables or connectors. Use insulated tools to minimize the risk of electrical contact. Avoid working in damp environments, as moisture can conduct electricity. Ensure all connections are secure to prevent short circuits. Never touch live wires or components without proper insulation. If unsure about voltage levels, use a multimeter to verify. Keep work areas well-lit to maintain clear visibility. Ground yourself by wearing an anti-static wrist strap to discharge static electricity. Regularly inspect tools and cables for damage, replacing them if compromised. Adhering to these practices ensures a safe working environment.
Best Practices for Installation
When installing RJ11 connectors, follow best practices to ensure reliability and performance. Always plan cable routes in advance to minimize interference and damage. Use high-quality UTP or STP cables suitable for your application. Secure cables properly with clips or ties to avoid strain. Follow T568A or T568B wiring standards for consistent connections. Test each connection with a cable tester to verify continuity and identify faults. Label cables clearly for easy identification. Avoid tight bends or kinks in the cable, as they can degrade signal quality. Regularly inspect and maintain connections to prevent corrosion or wear. Document your wiring setup for future reference. These practices ensure a professional and durable installation.
Advanced Topics in RJ11 Wiring
Exploring advanced RJ11 techniques, including upgrading to RJ45 for higher speeds, integrating patch panels, and designing efficient wired networks for enhanced performance and connectivity.
Upgrading to RJ45
Upgrading from RJ11 to RJ45 offers enhanced connectivity and speed, ideal for modern networking needs. RJ45 supports up to Gigabit Ethernet, making it superior for high-bandwidth applications. The process involves assessing existing wiring, ensuring Cat5e or higher cables are installed, and replacing RJ11 jacks with RJ45 connectors; This upgrade is particularly beneficial for homes and offices requiring reliable, fast internet connections. By migrating to RJ45, users can future-proof their network infrastructure, supporting advanced devices and applications. This transition ensures compatibility with current and emerging technologies, providing a robust foundation for data transmission needs.
Using Patch Panels
Patch panels are essential for organizing and managing network cables, enabling efficient connections between devices. They provide a centralized point for linking RJ11 and RJ45 jacks, simplifying cable management. By installing a patch panel, you can easily route and rearrange cables, improving network flexibility. Patch panels are particularly useful in home and office setups, allowing for neat and scalable wiring configurations. They support both voice and data transmission, making them versatile for modern networking needs. Properly configuring a patch panel ensures reliable connections and simplifies troubleshooting, while also enhancing the overall aesthetics of your wiring setup.
Planning a Wired Home Network
Planning a wired home network with RJ11 wiring involves assessing device locations, installing a central patch panel, and selecting appropriate cables. Start by identifying where internet-enabled devices are situated to determine cable routes. A patch panel in a central location like a home office or utility closet helps organize cables and simplifies management. Choose UTP cables for common Ethernet connections, ensuring they meet the required lengths without exceeding the 100-meter limit to prevent signal loss. Properly label cables for clarity and consider using 6-pin RJ11 connectors for flexibility. Follow wiring standards like T568A or T568B, and test connections post-installation. Prioritize scalability and safety, ensuring secure connections and anticipating future needs for potential upgrades.
Mastering RJ11 wiring basics, proper installation, and troubleshooting ensures reliable telecommunication setups. This guide provides a foundation for understanding and implementing RJ11 connections effectively in various networking environments;
RJ11 wiring is essential for telecommunication setups, primarily used in phone and modem connections. The connector typically features 4 or 6 pins, with specific wire color coding for installation. Proper wiring ensures reliable functionality, while incorrect termination can lead to connection issues. Tools like wire strippers and crimpers are necessary for accurate setup. Understanding the difference between UTP and STP cables is crucial for choosing the right material. Troubleshooting common mistakes, such as incorrect pin connections, is vital for maintaining signal integrity. Following best practices and safety guidelines ensures a secure and efficient installation process. This guide provides a comprehensive overview to help users master RJ11 wiring effectively.
Encouragement for Further Learning
Mastering RJ11 wiring is a valuable skill for anyone interested in telecommunications or networking. To deepen your knowledge, explore resources like “The Information Transport Systems Installation Guide” or online tutorials that detail advanced wiring techniques. Practicing with hands-on projects, such as upgrading to RJ45 or setting up a home network, will reinforce your understanding. Consider enrolling in courses or joining forums where professionals share insights and troubleshooting tips. Continuous learning ensures you stay updated with industry standards and can tackle more complex projects with confidence. Keep experimenting and expanding your expertise to become proficient in both basic and advanced wiring systems.
Additional Resources
For deeper understanding, explore resources like “The Information Transport Systems Installation Guide,” a comprehensive book for cabling professionals. Online articles, such as “Testing Home Ethernet Points with an RJ45/RJ11 Cable Tester,” offer practical insights. Websites like http://www.shaunchng.com provide detailed tutorials and troubleshooting tips. Additionally, forums and communities where professionals share their experiences can be invaluable. Consider enrolling in networking courses or certifications to further your skills. These resources will help you stay updated on industry standards and enhance your ability to tackle complex wiring projects with confidence and precision.