The Honeywell T4 Pro Programmable Thermostat offers a user-friendly design with smart home integration, geofencing, and energy-saving features, making it ideal for modern HVAC systems and homeowner convenience.
1.1 Overview of the Honeywell T4 Pro Programmable Thermostat
The Honeywell T4 Pro Programmable Thermostat is designed for simplicity and efficiency, offering a sleek interface with on-screen menus for easy configuration. It supports geofencing, allowing users to save energy based on their location. Compatible with various HVAC systems, including OpenTherm boilers, it ensures seamless integration and optimal performance. The thermostat features a universal mounting system, making installation straightforward. With optional cover plate customization, it adapts to different home decors. Battery or hardwired power options are available, and the screen light can be configured to stay on or timeout for energy efficiency. This model balances advanced features with user-friendly operation, making it a versatile choice for homeowners.
1.2 Importance of Using the Installation Manual
The Honeywell T4 Pro Programmable Thermostat installation manual is essential for a smooth and safe setup process. It provides step-by-step instructions to ensure compatibility with your HVAC system and prevents potential errors. The manual outlines safety precautions, tools needed, and wiring configurations, reducing the risk of installation mistakes. Additionally, it covers troubleshooting common issues and highlights features like geofencing and energy-saving modes. By following the manual, users can optimize their thermostat’s performance, ensure proper functionality, and maintain warranty validity. It also serves as a reference for advanced features and manufacturer support, making it indispensable for both installers and homeowners.
System Requirements and Compatibility
The Honeywell T4 Pro Programmable Thermostat is compatible with most HVAC systems, including OpenTherm boilers, and requires specific wiring configurations for optimal performance. Always refer to the installation manual for detailed compatibility and system requirements to ensure proper functionality.
2.1 Understanding the Compatibility of Honeywell T4 with HVAC Systems
The Honeywell T4 Pro Programmable Thermostat is designed to work seamlessly with a wide range of HVAC systems, including forced air, hydronic, and heat pump systems. It is compatible with gas, oil, and electric furnaces, as well as dual-fuel systems. The thermostat’s OpenTherm integration allows it to communicate with modern boilers, optimizing heating performance. Additionally, it supports geofencing and smart home integration, enhancing energy efficiency and convenience. Always verify compatibility with your specific HVAC system using the installation manual to ensure proper functionality and safe installation. This ensures the thermostat operates efficiently and effectively in your home.
2.2 Checking the Compatibility with Your Boiler or Heating System
Before installing the Honeywell T4 Pro Programmable Thermostat, ensure it is compatible with your boiler or heating system. The thermostat supports OpenTherm boilers, enabling advanced communication for optimal performance. It also works with traditional boilers and heating systems, including gas, oil, and electric setups. Refer to the installation manual to verify compatibility with your specific boiler type. Proper compatibility ensures efficient operation, safety, and energy savings. Incompatible systems may lead to reduced performance or safety hazards. Always consult the manual or a professional installer if unsure about your system’s compatibility. This step is crucial for a successful installation.
Pre-Installation Checklist
Before installing the Honeywell T4 Pro Programmable Thermostat, ensure compatibility with your HVAC system, gather all required tools, and follow safety guidelines for a smooth process.
3.1 Tools and Materials Needed for Installation
To install the Honeywell T4 Pro Programmable Thermostat, you will need a screwdriver, pliers, and a voltage tester for safe electrical connections. Gather materials such as wall anchors, screws, and the optional cover plate if required. Ensure compatibility with your HVAC system by verifying the wiring configuration. Refer to the installation manual for specific tools tailored to your system type. Proper preparation of these items ensures a smooth and efficient installation process. Always verify compatibility and safety guidelines before starting.
3.2 Safety Precautions Before Starting the Installation
Before installing the Honeywell T4 Pro Programmable Thermostat, ensure the power to your HVAC system is turned off at the circuit breaker. Use a voltage tester to confirm no electricity is present. Avoid touching electrical components or wires without proper insulation. Allow the system to cool down completely if it was recently in use. Keep the installation area clear of flammable materials and ensure good ventilation. Never bypass safety features or ignore warnings in the installation manual. If unsure about any step, consider consulting a licensed professional to ensure a safe and correct installation.
Step-by-Step Installation Guide
The Honeywell T4 installation involves mounting the thermostat, connecting wires, configuring settings, and finalizing the setup. Always follow the manual for a smooth process.
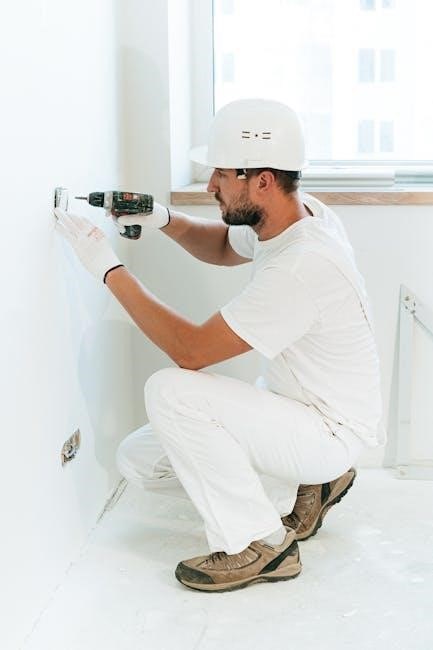
4.1 Mounting the Thermostat on the Wall
The Honeywell T4 Pro Programmable Thermostat features a universal mounting system, ensuring compatibility with most standard wiring setups. Begin by attaching the wallplate to the desired location using the provided screws. Ensure the surface is level and clean for proper installation. If using the optional cover plate, align it with the wallplate before securing. Once mounted, connect the wires according to the manual’s wiring diagram. The thermostat’s on-screen menu will guide you through the initial setup process. This step ensures a secure and visually appealing installation, ready for configuring advanced features like geofencing and scheduling.
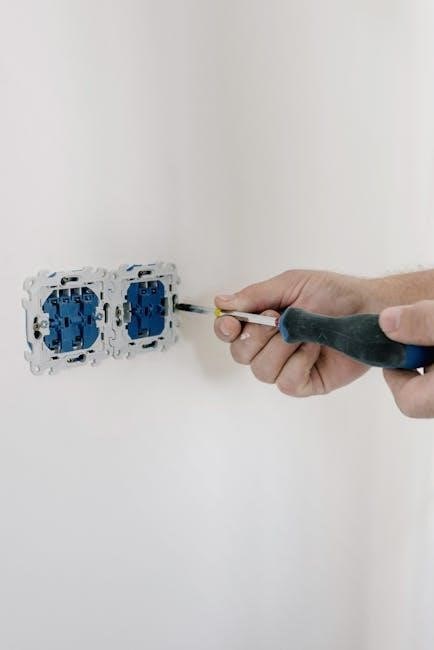
4.2 Connecting the Wires to the Thermostat
To connect the wires to the Honeywell T4 Pro Programmable Thermostat, start by ensuring the power to your HVAC system is turned off. Remove the faceplate and locate the terminal screws. Refer to the wiring diagram in the installation manual to match the correct wires (e.g., R, W, Y, G, C) to their respective terminals. Secure each wire firmly to avoid loose connections. For systems with an OpenTherm boiler, ensure the communication wires are properly linked. Once all wires are connected, replace the faceplate and turn the power back on. The thermostat will guide you through the setup process via the on-screen menu. Proper wiring ensures seamless functionality and compatibility with advanced features like geofencing and energy-saving modes.
4.3 Configuring the Optional Cover Plate
The optional cover plate for the Honeywell T4 Pro Programmable Thermostat is designed to enhance the installation’s appearance and provide a clean finish. To configure it, remove the thermostat’s faceplate and align the cover plate with the mounting bracket. Secure it using the provided screws, ensuring a flush fit. The cover plate does not interfere with the thermostat’s functionality and is compatible with the universal mounting system. Once installed, it conceals any exposed wiring, offering a sleek and professional look. The cover plate is optional and does not require additional tools for installation. It is included in the mounting hardware package for convenience.
4.4 Finalizing the Installation and Powering On the Thermostat
After completing the wiring and mounting, ensure all connections are secure and double-check the configuration. Turn the power back on at the circuit breaker or fuse box. The thermostat’s display should illuminate, indicating successful power-up. Test basic functionality by adjusting the temperature and verifying system response. If equipped with smart features, connect the thermostat to your Wi-Fi network and link it to your smart home app. Review the on-screen setup to confirm proper operation and scheduling. This step ensures your Honeywell T4 Pro is ready for optimal performance and energy efficiency.
Advanced Features of the Honeywell T4
The Honeywell T4 Pro offers geofencing, smart home integration, and energy-saving modes. It supports OpenTherm boiler communication and provides detailed energy reports for optimal performance and efficiency.
5.1 Geofencing and Smart Home Integration
The Honeywell T4 Pro Programmable Thermostat supports geofencing, allowing it to automatically adjust temperatures based on your location. This feature helps save energy when you’re away and ensures comfort upon return. The thermostat also integrates seamlessly with popular smart home systems like Apple HomeKit and Google Assistant, enabling voice control and remote adjustments. By connecting to your smart home network, you can enhance your home’s convenience and energy efficiency. These advanced features make it easier to optimize your heating and cooling without manual adjustments, ensuring a smarter and more comfortable living experience.
5.2 Energy-Saving Features and Scheduling
The Honeywell T4 Pro Programmable Thermostat includes advanced energy-saving features designed to optimize your heating and cooling usage. With smart scheduling, you can create daily temperature plans that align with your lifestyle, reducing energy waste. The thermostat also offers an adaptive recovery feature, which learns your system’s performance to reach desired temperatures efficiently; Additionally, it provides energy usage reports to help you identify savings opportunities. By pre-setting your schedule and utilizing these features, you can minimize energy consumption while maintaining comfort. This ensures your system operates efficiently, reducing both your bills and environmental impact.
5.3 OpenTherm Boiler Integration and Alerts
The Honeywell T4 Pro Programmable Thermostat seamlessly integrates with OpenTherm-compatible boilers, enabling precise temperature control and efficient heating management. This two-way communication allows the thermostat to receive and display alerts directly from the boiler, ensuring you stay informed about your heating system’s status. Alerts can indicate issues such as system malfunctions or maintenance needs, helping you address problems promptly. This integration enhances overall system performance and energy efficiency, while also extending the lifespan of your boiler. By leveraging OpenTherm technology, the T4 thermostat ensures optimal comfort and reliability in your home.
Programming the Honeywell T4 Thermostat
The Honeywell T4 Pro Programmable Thermostat features a user-friendly interface with on-screen menus for easy configuration. Set daily schedules and adjust temperature settings to maximize energy efficiency.
6.1 Setting Up Daily Schedules
The Honeywell T4 Pro Programmable Thermostat allows users to set up daily schedules with ease. Using the on-screen menu, you can configure temperature settings for different times of the day. This feature ensures optimal comfort and energy efficiency. For example, you can set a lower temperature when no one is home and a warmer temperature for your return. The thermostat also supports geofencing, which automatically adjusts settings based on your location. By programming daily schedules, you can save energy and maintain a consistent indoor climate tailored to your routine.
6.2 Adjusting Temperature Settings for Optimal Energy Use
The Honeywell T4 Pro Programmable Thermostat enables precise temperature adjustments to maximize energy efficiency. By setting lower temperatures when the house is unoccupied and raising them when needed, you can significantly reduce energy consumption. The thermostat also supports geofencing, which automatically adjusts settings based on your location. Additionally, the T4 allows you to program temperature limits to avoid extreme settings, ensuring consistent comfort while saving energy. Regularly reviewing and adjusting these settings can further optimize your energy use and lower utility bills. This feature is especially useful for households with variable schedules.
6;3 Using the On-Screen Menus for Configuration
The Honeywell T4 Pro Programmable Thermostat features intuitive on-screen menus that simplify configuration. Navigate through settings using the + and — buttons to adjust temperatures, schedules, and system preferences. The menu allows you to enable energy-saving modes, set geofencing parameters, and customize comfort profiles. Access advanced options like OpenTherm boiler integration and smart home compatibility directly from the interface. The thermostat also provides clear prompts and visual feedback, ensuring a seamless setup experience. Use the menu to review and modify configurations, optimizing your heating and cooling system for efficiency and comfort.
Troubleshooting Common Issues
Common issues with the Honeywell T4 include connectivity problems, display malfunctions, and boiler communication errors. These can often be resolved with basic troubleshooting steps outlined in the manual.
7.1 Resolving Connectivity Problems
Connectivity issues with the Honeywell T4 can often be resolved by restarting the thermostat or checking the Wi-Fi network connection. Ensure the thermostat is properly connected to your home’s Wi-Fi and that the router is functioning. If issues persist, power cycle the thermostat by removing batteries or cutting power at the circuit breaker. Verify that the thermostat’s software is up to date, as outdated versions may cause connectivity problems. Additionally, check for any physical obstructions between the thermostat and router that could interfere with the signal. Refer to the installation manual for detailed troubleshooting steps.
7.2 Fixing Display Issues and Screen Light Settings
Display issues on the Honeywell T4 can often be resolved by cleaning the screen with a soft cloth or checking for software updates. If the screen light is too dim or remains on constantly, adjust the screen light settings in the thermostat’s menu. For battery-powered models, the screen light may only stay lit for 8 seconds to conserve energy. Ensure the thermostat is properly installed and configured to avoid display malfunctions. Refer to the installation manual for guidance on resetting or adjusting screen settings to optimize visibility and functionality.
7.3 Addressing Boiler Communication Errors
If your Honeywell T4 thermostat fails to communicate with your boiler, ensure all connections are secure and properly configured. Restart the thermostat and boiler system to reset communication. For OpenTherm boilers, verify compatibility and check the heat demand icon on the thermostat. If issues persist, review the installation manual for specific troubleshooting steps or contact Honeywell support for assistance. Regular software updates and correct wiring are essential for maintaining reliable boiler communication and optimal heating system performance.
Maintenance and Care
Regularly clean the Honeywell T4 thermostat screen with a soft cloth to ensure display clarity. Replace batteries if applicable and update software for optimal performance. Refer to the manual for detailed care instructions to maintain functionality and extend lifespan.
8.1 Cleaning the Thermostat Screen
To maintain the Honeywell T4 thermostat’s display clarity, regularly clean the screen using a soft, dry cloth. Avoid harsh chemicals or abrasive materials, as they may damage the screen. For stubborn smudges, lightly dampen the cloth with water, but ensure it is not soaking wet to prevent moisture damage. Power off the thermostat before cleaning to avoid any accidental settings changes. Frequent cleaning helps ensure optimal visibility and functionality, keeping your thermostat operating smoothly and maintaining its sleek appearance. Refer to the manual for additional care tips to prolong the lifespan of your device.
8.2 Replacing Batteries (If Applicable)
If your Honeywell T4 thermostat is battery-powered, replace the batteries when the low-battery indicator appears. Turn off power at the circuit breaker before starting. Open the battery compartment, usually located on the back or bottom, by sliding it off or unscrewing it. Remove the old batteries and insert new ones of the same type (AA or AAA alkaline recommended). Replace the compartment securely and restore power. Test the thermostat to ensure proper function. Always refer to the installation manual for specific guidance, as some models may vary. Regular battery replacement ensures uninterrupted performance and accurate temperature control.
8.3 Updating the Thermostat Software
To ensure optimal performance and access to the latest features, regularly update your Honeywell T4 thermostat software. Check for updates via the on-screen menu by navigating to the settings section. If an update is available, follow the prompts to download and install it. The thermostat will restart during the process, so ensure it remains powered on; Updates may include new features, bug fixes, or compatibility improvements. Refer to the installation manual for detailed instructions, as some updates may require specific steps. Keeping your thermostat software up-to-date ensures enhanced functionality and energy efficiency.

Manufacturer Support and Resources
Honeywell provides comprehensive support resources for the T4 thermostat, including the installation manual, customer support contact options, and a network of authorized Resideo Pro installers.
9.1 Accessing the Honeywell T4 Installation Manual PDF
The Honeywell T4 Pro Programmable Thermostat installation manual is readily available in PDF format on Honeywell’s official website. Users can download it directly by visiting the support section and searching for the T4 model. Additionally, the manual can be accessed through the Resideo website, ensuring easy availability for installers and homeowners. The manual provides detailed step-by-step instructions, wiring diagrams, and troubleshooting tips, making it an essential resource for proper installation and configuration. It is crucial to refer to this guide to ensure compatibility with your HVAC system and to optimize the thermostat’s performance.
9.2 Contacting Honeywell Customer Support
For assistance with the Honeywell T4 Pro Programmable Thermostat, customers can contact Honeywell’s customer support team through various channels. Visit the official Honeywell website for contact information, including phone numbers, email, and live chat options. Support is available to address installation queries, troubleshooting, and general product inquiries. Representatives are trained to provide detailed guidance, ensuring a seamless experience. Additionally, the website offers a comprehensive resource section with FAQs, manuals, and troubleshooting guides. Honeywell’s customer support operates during specified hours, ensuring timely assistance for all user needs.
9.3 Finding Authorized Resideo Pro Installers
To ensure a professional and correct installation of the Honeywell T4 Pro Programmable Thermostat, it is recommended to use an authorized Resideo Pro installer. These experts are trained to handle the thermostat’s advanced features and ensure compatibility with your HVAC system. Visit the Honeywell website to find a list of authorized installers in your area. You can also use the online “Find a Pro” tool to locate certified professionals. Contacting Honeywell customer support can also provide recommendations for trusted installers. Using an authorized installer guarantees proper setup, optimal performance, and warranty validation for your Honeywell T4 thermostat.
The Honeywell T4 Pro Thermostat is an excellent choice for energy efficiency and home comfort. Proper installation and configuration are key to unlocking its full potential.
10.1 Summary of Key Installation Steps
The Honeywell T4 Pro Programmable Thermostat installation involves mounting the device, connecting wires, and configuring settings. Start by removing the old thermostat and preparing the wall. Mount the T4 base plate securely, ensuring proper alignment. Next, connect the wires according to the manual, matching colors to their respective functions. If using the optional cover plate, install it to conceal any wall marks. Finally, power on the thermostat and follow the on-screen prompts to set up schedules and preferences. Always refer to the official Honeywell T4 installation manual for detailed guidance. Professional installation is recommended for optimal performance.
10.2 Maximizing Energy Efficiency with Proper Configuration
Proper configuration of the Honeywell T4 Pro Programmable Thermostat is key to maximizing energy efficiency. By setting up daily schedules and adjusting temperature settings, users can optimize heating and cooling usage. Enable geofencing to automatically adjust temperatures when you leave or arrive home, reducing unnecessary energy consumption. Smart home integration allows seamless control via apps, ensuring settings align with your lifestyle. Regularly review and update your preferences to maintain optimal energy-saving performance. Refer to the installation manual for guidance on configuring these features effectively to lower energy bills and enhance comfort.