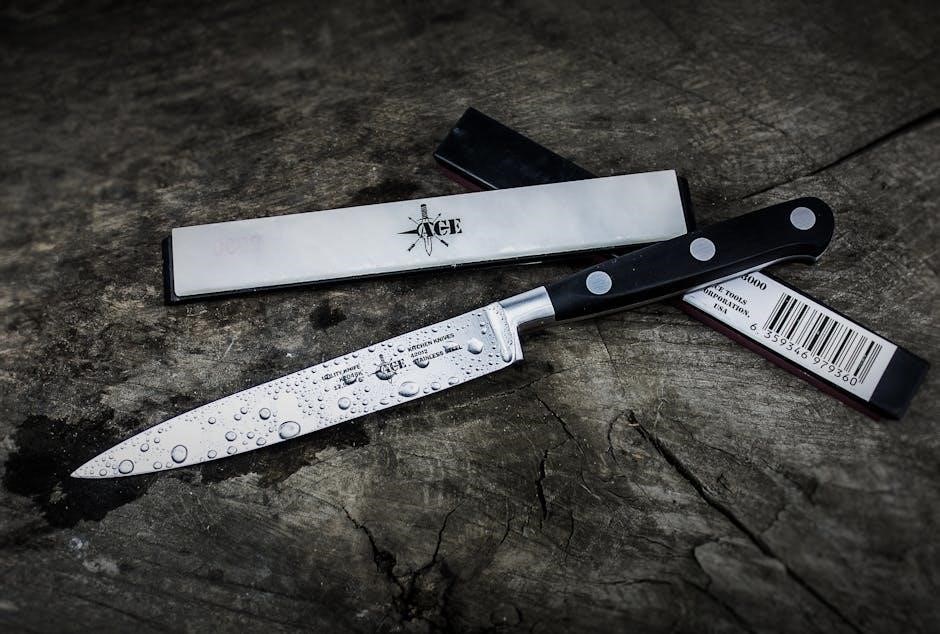
The Smiths 2-Step Knife Sharpener is a portable, two-stage sharpening tool designed for precision and safety. It features tungsten carbide blades for coarse sharpening and ceramic rods for fine honing, ensuring a razor-sharp edge every time. Its compact design and non-slip rubber feet make it easy to use anywhere, providing a reliable solution for maintaining your knives’ edges.
1.1 Overview of the Product
The Smiths 2-Step Knife Sharpener is a compact, portable tool designed for easy knife sharpening. It features a two-stage system: tungsten carbide blades for coarse sharpening and ceramic rods for fine honing. The sharpener is preset to a 20-degree angle for straight edges and 25 degrees for serrated edges, ensuring precise results. Its lightweight design, non-slip rubber feet, and lanyard hole make it ideal for use at home, in the kitchen, or on the go.
1.2 Importance of Knife Sharpening
Knife sharpening is essential for maintaining blade efficiency and safety. A dull knife requires more force, increasing the risk of accidents. Regular sharpening ensures precise cuts, reduces pressure applied, and prolongs the knife’s lifespan. Sharp blades are also cleaner, reducing the risk of contamination. Proper sharpening enhances overall performance, making cooking and cutting tasks easier and more precise, while preserving the quality of your knives for years to come.
1.3 Benefits of Using the Smiths 2-Step Sharpener
The Smiths 2-Step Sharpener offers convenience, precision, and versatility. Its two-stage system quickly restores dull blades with tungsten carbide and refines edges with ceramic rods. Portable and lightweight, it features a lanyard hole for easy transport. Non-slip rubber feet ensure stability, while preset angles guarantee consistent results. Suitable for both straight and serrated edges, this sharpener delivers professional-grade sharpness effortlessly, making it an indispensable tool for home, outdoor, or professional use.

Safety Precautions and Tips
Always place the sharpener on a stable surface and use light, controlled strokes. Keep fingers away from blades during sharpening. Store the sharpener securely out of reach of children to ensure safe usage and maintenance.
2.1 General Safety Guidelines
Always place the sharpener on a stable, flat surface and ensure the knife is properly aligned before sharpening. Avoid applying excessive pressure, as this can damage the blade or cause injury. Keep your fingers away from the sharpening slots and blades at all times. Maintain control of the knife during the sharpening process to prevent accidents. Store the sharpener in a secure location out of children’s reach when not in use.
2.2 Handling the Sharpener Safely
Grasp the sharpener firmly with one hand, ensuring it is securely positioned on a non-slip surface. Use your other hand to guide the knife through the sharpening slots, maintaining a steady and controlled motion. Avoid touching the sharpening components or applying excessive force, which can lead to unintended injuries or damage. Always sharpen away from your body to minimize potential hazards during the process.
2.3 Safety Tips for Beginners
Always wear protective gloves to prevent cuts. Keep loose clothing and long hair tied back. Ensure the knife is clean and dry before sharpening. Start with light pressure and gradually increase as needed. Avoid sharpening near children or pets. Store the sharpener in a secure location when not in use. Practice on an old knife first to build confidence and skill before sharpening your best blades.

Assembly and Setup
Unpack the base, sharpening head, and handle. Attach the handle securely to the base. Place the sharpener on a stable, flat surface for safe and effective use.
3.1 Unpacking and Identifying Components
Begin by carefully unpacking the Smiths 2-Step Knife Sharpener, which comes disassembled in three pieces: the base, sharpening head, and handle. Identify each component to ensure all parts are included. Inspect the base for the sharpening slots, the head for the tungsten carbide blades and ceramic rods, and the handle for secure attachment points. Verify that no components are damaged before proceeding to assembly. This step ensures proper setup and functionality.
3.2 Attaching the Handle
To attach the handle, align its mounting points with those on the base of the sharpener. Gently press and twist the handle until it clicks securely into place. Ensure it is tightly fastened to prevent movement during use. Once attached, double-check the handle’s stability to confirm a firm connection. Properly securing the handle is crucial for maintaining control and safety while sharpening your knife.
3.3 Placing the Sharpener on a Stable Surface
Position the Smiths 2-Step Knife Sharpener on a flat, stable surface, such as a countertop or table. Ensure the base is secure and even to prevent movement during use. The non-slip rubber feet will help maintain stability. Place the sharpener near the edge of the surface, allowing the knife blade to extend about 1 inch beyond the edge for optimal sharpening. This setup ensures safety and effectiveness while sharpening your knife.
Choosing the Right Sharpener for Your Needs
Selecting the ideal sharpener depends on your knife type, sharpening frequency, and desired precision. The Smiths 2-Step Sharpener excels for straight and serrated edges, offering portability and ease of use, making it a versatile choice for home and outdoor use.
4.1 Understanding Different Knife Types
Understanding knife types is crucial for effective sharpening. Straight-edge knives, like chef knives, are ideal for slicing and chopping, requiring a precise, even edge. Serrated knives, such as bread knives, need special attention to maintain their toothed edges. The Smiths 2-Step Sharpener accommodates both types, with dedicated slots for each. Knowing your knife type ensures proper sharpening technique and optimal results, making the Smiths sharpener a versatile tool for any blade.
4.2 Features to Look for in a Knife Sharpener
When selecting a knife sharpener, look for features like adjustable angles, multiple sharpening stages, and durable materials. A two-stage system, such as coarse and fine sharpening, ensures both quick edge restoration and precise honing. Portability, ease of use, and safety features like non-slip bases are also essential. The Smiths 2-Step Sharpener exemplifies these qualities, offering preset angles and a compact design for efficient sharpening on the go.
4.3 Why the Smiths 2-Step is Ideal for Most Users
The Smiths 2-Step Knife Sharpener is ideal for most users due to its simplicity and effectiveness. Its two-stage system offers quick edge restoration with tungsten carbide blades and fine tuning with ceramic rods. The preset 20-degree angle ensures consistency, while the non-slip base enhances safety. Its compact, portable design makes it easy to use anywhere, catering to both home cooks and outdoor enthusiasts seeking a reliable sharpening solution.

Features of the Smiths 2-Step Knife Sharpener
Tungsten carbide blades quickly restore edges, while ceramic rods fine-tune for sharpness. Non-slip rubber feet ensure stability, and a portable design with a lanyard hole adds convenience.
5.1 Tungsten Carbide Blades
The Smiths 2-Step Sharpener features tungsten carbide blades, which are exceptionally durable and effective for sharpening. These blades are designed to quickly restore a dull knife edge, ensuring a sharp and precise cut. The preset 20-degree angle guides the blade through the sharpening process, making it easy to achieve professional results. The carbide blades are ideal for coarse sharpening, preparing the knife for final honing on the ceramic rods;
5.2 Ceramic Rods for Fine Sharpening
The ceramic rods in the Smiths 2-Step Sharpener are designed for fine honing, providing a polished and razor-sharp edge. After using the tungsten carbide blades for coarse sharpening, the ceramic rods refine the blade’s edge, removing microscopic imperfections. This step ensures a smooth, even cut, making it ideal for finishing and maintaining knife edges. The rods are durable and long-lasting, delivering consistent results with each use.
5.3 Non-Slip Rubber Feet
The Smiths 2-Step Knife Sharpener features non-slip rubber feet that ensure stability during use. These feet prevent the sharpener from moving or slipping on surfaces, enhancing safety and control while sharpening. This design allows for consistent results and reduces the risk of accidents, especially for beginners. The rubber feet also protect surfaces from scratches, making the sharpener suitable for use on various countertops or workspaces.
5.4 Portable Design with Lanyard Hole
The Smiths 2-Step Knife Sharpener features a lightweight, compact design with a built-in lanyard hole for easy portability. This allows users to attach it to a keychain, backpack, or belt, making it ideal for outdoor activities, camping, or travel. The lanyard hole enhances convenience, ensuring the sharpener is always within reach while maintaining a sleek and durable construction that withstands regular use on the go.
Step-by-Step Sharpening Instructions
Sharpen your knife in two easy steps: insert the blade into the coarse slot for quick edge restoration, then refine it in the fine slot for a polished finish.
6.1 Preparing Your Knife for Sharpening
Begin by cleaning your knife to remove any food particles or debris. Ensure the blade is dry and free of obstructions. Place the knife on a stable surface with the edge facing upwards. For serrated blades, locate the serrated slot on the sharpener. Adjust the angle guide to 20° for straight edges or 25° for serrated edges. Proper preparation ensures effective sharpening and prevents damage to the blade or sharpener.
6.2 Setting the Correct Sharpening Angle
Setting the correct sharpening angle is crucial for effective results. For straight-edge blades, use the 20° preset angle, while serrated edges require 25°. Locate the adjustable angle guide on the sharpener and set it accordingly. Ensure the knife is held straight up and down during this process. Proper alignment guarantees a precise edge and prevents unnecessary wear on the blade or sharpener.
6.3 Sharpening a Straight Edge Blade
Insert the straight edge blade into the coarse sharpening slot at the preset 20° angle. Hold the knife straight up and down, ensuring full insertion. With light, consistent pressure, pull the blade from heel to tip in a smooth stroke. Repeat 3-4 times, then switch to the fine ceramic stage for final honing. This process restores and maintains a sharp, precise edge effortlessly.
6.4 Sharpening a Serrated Edge Blade
For serrated blades, insert the serrated portion into the slot marked “SERRATED.” Hold the knife vertically with the blade fully inserted. Using light, downward pressure, pull the serrated edge through the slot from heel to tip in a smooth, consistent stroke. Repeat 3-4 times to restore the serrations. This method ensures each serration is sharpened evenly, maintaining the blade’s unique cutting performance and edge retention.
Maintenance and Care
Regularly clean the sharpener with a soft brush or cloth to remove metal particles. Store it in a dry place to prevent rust. Occasional sharpening of the ceramic rods ensures optimal performance.
7.1 Cleaning the Sharpener
Clean the Smiths 2-Step Knife Sharpener regularly to maintain its effectiveness. Use a soft brush or cloth to remove metal particles and debris from the tungsten carbide and ceramic components. Avoid harsh chemicals or abrasive materials that could damage the surfaces. Wipe down the sharpener with a dry cloth after cleaning to prevent moisture buildup, ensuring optimal performance and longevity of the tool.
7.2 Storing the Sharpener Properly
Store the Smiths 2-Step Knife Sharpener in a dry, cool place to prevent rust and damage. Keep it away from direct sunlight and moisture. Use the lanyard hole to attach it securely to a bag or keychain for portability. Avoid storing it in humid environments or near abrasive materials; Ensure the sharpener is clean and dry before storage to maintain its performance and longevity.
7.3 Maintaining the Sharpener’s Performance
Regularly clean the sharpener after use to remove metal particles and debris. Inspect the tungsten carbide blades and ceramic rods for wear. Store the sharpener in a dry place to prevent rust. Lightly wipe the surfaces with a dry cloth to maintain sharpness. Avoid using harsh chemicals, as they may damage the materials. Proper maintenance ensures the sharpener remains effective and extends its lifespan for consistent results.
Troubleshooting Common Issues
Common issues include blades not sharpening properly, slipping, or damage. Check sharpening angles, clean debris, and ensure stable placement. For persistent problems, contact customer support.
8.1 Blade Not Sharpening Properly
If your blade isn’t sharpening properly, ensure correct angle alignment and adequate pressure. Check for debris in the slots and clean them. Inspect for dull carbide or ceramic components, which may need replacement. Lightly cleaning the blades or replacing worn parts can restore sharpening effectiveness. Always follow the manufacturer’s guidelines for maintenance and part replacement to ensure optimal performance.
8.2 Sharpener Slipping During Use
To prevent the sharpener from slipping, ensure the non-slip rubber feet are clean and dry. Place the sharpener on a stable, flat surface, such as a rubber mat or countertop. Hold the sharpener firmly or clamp it in place for added stability. Sharpening on a damp surface can also improve grip. Regular cleaning of the rubber feet will maintain their traction and prevent slipping during use.
8.3 Damage to the Sharpener
Inspect the sharpener regularly for wear or damage. Avoid using excessive force, as it may damage the tungsten carbide or ceramic components. Clean the sharpener with a soft cloth and avoid harsh chemicals. Store it in a dry place, away from extreme temperatures. Handle with care to prevent drops or impacts. Proper maintenance and storage will ensure the sharpener remains in good condition and continues to perform effectively.

Comparing with Other Sharpeners
The Smiths 2-Step Knife Sharpener stands out for its portability and two-stage sharpening system. Unlike electric sharpeners, it offers manual control, while its preset angles surpass whetstone sharpeners’ learning curve, making it ideal for both beginners and experienced users seeking convenience and precision.
9.1 vs. Electric Sharpeners
The Smiths 2-Step Knife Sharpener offers a manual, portable alternative to electric sharpeners, providing more control and precision at a lower cost. While electric sharpeners are faster, they often lack the portability and affordability of the Smiths model. The 2-Step Sharpener’s two-stage system ensures a sharp edge without the bulk or noise of electric devices, making it ideal for outdoor use or travel.
9.2 vs. Whetstone Sharpeners
The Smiths 2-Step Knife Sharpener differs from whetstone sharpeners by offering a more user-friendly, pre-set angle system. While whetstones require skill and time to achieve the correct angle, the Smiths sharpener simplifies the process with its two-stage design. It’s faster and more convenient for casual users, though whetstones may offer more precision for experienced sharpeners. The Smiths model is ideal for those seeking quick, consistent results without the learning curve of traditional whetstone sharpening.
9.3 vs. Diamond Stone Sharpeners
Diamond stone sharpeners are known for their durability and aggressive sharpening capabilities, making them a favorite among professionals. In comparison, the Smiths 2-Step Knife Sharpener offers a more compact and portable design, ideal for everyday use. While diamond stones excel at restoring severely dull blades, the Smiths sharpener provides a quick, two-stage process for maintaining edges. It’s a practical choice for home cooks and outdoor enthusiasts who need fast, reliable results without the bulk of a diamond stone.
Expert Tips for Optimal Results
Always sharpen at the recommended 20-degree angle for straight edges and 25 degrees for serrated blades. Use light, consistent pressure and clean the sharpener regularly for best performance.
10.1 Sharpening at the Correct Angle
Maintaining the correct angle is crucial for effective sharpening. The Smiths 2-Step Knife Sharpener is preset at a 20-degree angle for straight edges and 25 degrees for serrated blades. This ensures a precise edge without over-sharpening. Always align the blade according to the guide to achieve consistent results and prevent damage to the knife or sharpener. Proper angling enhances sharpness and extends blade life.
10.2 Using the Right Amount of Pressure
Using the right amount of pressure is key to effective sharpening. Apply light, consistent pressure in both the coarse and fine stages. Excessive force can damage the blade or sharpener. For the first stage, use slightly more pressure to set the edge, then lighter strokes in the second stage for honing. This ensures a sharp, durable edge without compromising the knife’s integrity.
10.3 Regular Maintenance for Consistency
Regular maintenance is crucial for consistent sharpening results. After each use, clean the sharpener to remove metal particles and debris. Store it in a dry place to prevent rust. Periodically inspect and replace worn-out components, such as the tungsten carbide blades and ceramic rods, to ensure optimal performance. Proper care ensures the Smiths 2-Step Sharpener remains effective for years, delivering sharp edges consistently.
The Smiths 2-Step Knife Sharpener is a durable tool that effectively sharpens knives with ease, consistently delivering sharp edges and satisfying results for various users, making it a reliable choice for long-term use.
11.1 Summary of Key Points
The Smiths 2-Step Knife Sharpener is a versatile tool offering two sharpening stages: tungsten carbide for coarse sharpening and ceramic rods for fine honing. Its portable design, non-slip rubber feet, and lanyard hole ensure ease of use and convenience. Effective for both straight and serrated edges, the sharpener delivers consistent results with minimal effort. Proper technique and regular maintenance are essential for optimal performance and longevity of the sharpener and your knives.
11.2 Final Thoughts on the Smiths 2-Step Sharpener
The Smiths 2-Step Knife Sharpener is an excellent choice for anyone seeking a reliable, portable sharpening solution. Its two-stage system ensures both quick edge restoration and fine honing, making it ideal for straight and serrated blades. With its durable construction and ease of use, it delivers professional-grade results for home cooks and outdoor enthusiasts alike. A must-have for maintaining sharp, precise knives with minimal effort and cost.

Additional Resources
Visit Smiths’ official website for detailed product information, troubleshooting guides, and customer support contact details. Additionally, explore instructional videos on YouTube and sharpening tips from outdoor enthusiasts to maximize your sharpener’s performance.
12.1 Manufacturer’s Website
The official Smiths website (www.smithsedge.com) offers comprehensive resources, including detailed product descriptions, instructional guides, and customer support. Find troubleshooting tips, warranty information, and FAQs specific to the 2-Step Knife Sharpener. The site also provides a contact form and phone number for assistance, ensuring easy access to help when needed. Visit for authentic product details and expert sharpening advice.
12.2 Customer Service Contact
For assistance with the Smiths 2-Step Knife Sharpener, contact their Customer Service Department at (800) 221-4156. This dedicated team is available to address any questions, provide troubleshooting support, or assist with service work. Additionally, the manufacturer’s website offers a contact form for convenient online inquiries, ensuring prompt and reliable customer support for all your sharpening needs.
12.3 Recommended Sharpening Techniques
For optimal results, use the Smiths 2-Step Sharpener in two stages: coarse sharpening with tungsten carbide blades followed by fine honing with ceramic rods. Maintain the preset 20-degree angle for straight edges and 25 degrees for serrated blades. Apply light, consistent pressure and pull the blade through the slots smoothly. Regular maintenance ensures consistent performance, keeping your knives sharp and ready for any task.