Delta 3-Way Diverter Valve Instructions: An Overview
Delta 3-way diverter valves offer versatile water control, commonly found in tub/shower combinations. These valves efficiently redirect water flow between the showerhead and the tub spout, providing convenient operation.
Understanding installation, operation, and troubleshooting ensures optimal performance and longevity of your Delta valve system. Proper maintenance is also crucial for continued reliability.
Understanding Delta 3-Way Diverter Valves
Delta 3-way diverter valves are integral components in many bathroom setups, specifically those featuring both a tub spout and a separate showerhead. Their primary function is to seamlessly redirect water flow between these two outlets, offering users a convenient and efficient bathing experience. Unlike traditional valves, these diverters utilize a single handle or mechanism to control the water’s path.
The “3-way” designation refers to the valve’s three ports: one for the incoming water supply, one for the tub spout, and one for the showerhead. Internally, a rotating cartridge or ball mechanism manages the water’s direction. These valves are known for their reliability and smooth operation, but understanding their inner workings is key to successful installation and maintenance.
Different Delta models exist, ranging from pressure-balancing valves to thermostatic valves, each offering varying degrees of temperature control and safety features. Familiarizing yourself with the specific type of diverter valve you have is essential before undertaking any repairs or adjustments.
Common Applications of Delta Diverter Valves
Delta 3-way diverter valves find widespread use in residential plumbing, primarily within tub and shower combinations. They are a standard feature in bathrooms designed for versatility, allowing users to easily switch between filling a bathtub and operating a showerhead. These valves are frequently incorporated into both new construction projects and bathroom renovation endeavors.
Beyond standard tub/shower setups, Delta diverter valves are also utilized in applications requiring the redirection of water flow to multiple outlets. This includes some shower systems with body sprays or handheld shower wands. Their compact design allows for integration into various plumbing configurations.
Furthermore, these valves are commonly found in both pressure-balancing and thermostatic valve assemblies, enhancing user safety and comfort by maintaining consistent water temperature. The durability and reliability of Delta products make them a popular choice for both homeowners and plumbing professionals.

Installation Process
Proper installation of a Delta 3-way diverter valve requires careful preparation and adherence to plumbing standards. Following these steps ensures a leak-free and functional shower system.
Tools Required for Installation
Successfully installing a Delta 3-way diverter valve demands having the correct tools readily available. Essential items include a pipe wrench for securely tightening connections, and a basin wrench to access tight spaces behind the wall.
You’ll also need a screwdriver set – both Phillips and flathead – for various valve components. PEX cutters or a hacksaw are necessary for precise pipe cutting, alongside a measuring tape for accurate dimensions.
A plumber’s tape (Teflon tape) is vital for creating watertight seals on threaded connections. Don’t forget safety glasses to protect your eyes, and potentially a stud finder to locate wall studs before cutting. Finally, a small bucket and towels are useful for catching drips and cleaning up any mess during the installation process.
Preparing the Shower Valve Rough-In
Before installing the Delta 3-way diverter, proper rough-in preparation is critical. First, ensure the water supply is completely shut off. Inspect the existing plumbing within the wall for any damage or corrosion, addressing issues before proceeding.
Verify the valve’s position aligns with the desired spout and showerhead locations, considering comfortable reach and spray coverage. Confirm the rough-in depth matches the Delta valve specifications to avoid future installation problems.
Clean the surrounding wall cavity of any debris or obstructions. Ensure adequate support is available for the valve body, potentially adding wood blocking if necessary. Finally, double-check all measurements and plumbing connections before moving forward with the valve installation.
Installing the Valve Body
Begin by carefully inserting the Delta 3-way diverter valve body into the prepared rough-in opening. Ensure it’s aligned correctly, referencing the manufacturer’s instructions for proper orientation. Apply a thin layer of plumber’s grease to the O-rings to facilitate a watertight seal and prevent future leaks.
Secure the valve body to the wall studs using appropriate screws, ensuring they are tightened firmly but not over-tightened, which could damage the valve or surrounding wall. Verify the valve body is flush with the finished wall surface, allowing for proper trim installation later.
Double-check the valve’s stability and alignment before proceeding to the next step. A secure and properly positioned valve body is essential for reliable operation and preventing future issues.
Connecting Water Supply Lines
Carefully connect the hot and cold water supply lines to the corresponding inlets on the Delta diverter valve body. Utilize appropriate fittings – typically copper or PEX – ensuring they are compatible with your existing plumbing system. Apply Teflon tape to the threads of all connections to create a watertight seal.
Tighten the fittings securely with a wrench, avoiding excessive force that could damage the valve or pipes. Once connected, slowly turn on the water supply to check for leaks at each connection point. Address any leaks immediately by tightening the fittings further or reapplying Teflon tape.
Properly secured and leak-free water supply lines are crucial for the diverter valve’s functionality and preventing water damage.
Diverter Valve Operation & Adjustment
Delta 3-way diverter valves smoothly switch water flow between the showerhead and tub spout. Adjust the handle to direct water precisely where needed for optimal use.
How the 3-Way Diverter Works
Delta 3-way diverter valves utilize a rotating mechanism, often a ball or cartridge, within the valve body to redirect water flow. When the handle is in one position, water is directed towards the tub spout, allowing for filling or faucet use. Rotating the handle to another position closes the path to the spout and simultaneously opens the pathway to the showerhead, delivering water for showering.
This redirection is achieved through internal channels and ports within the valve. The diverter cartridge, a key component, contains these pathways and precisely aligns them based on the handle’s position. A small amount of handle resistance is normal, indicating proper engagement with the internal mechanism. Understanding this internal process is vital for troubleshooting potential issues and ensuring smooth operation of your Delta shower system.
Adjusting Water Flow Between Spout and Showerhead
Delta 3-way diverter valves are designed for simple, yet precise, water flow adjustment. Typically, a single handle controls the redirection of water between the tub spout and the showerhead. A quarter-turn or similar movement is usually sufficient to switch between the two outlets. Ensure the handle is fully engaged in each position to guarantee complete water flow to the desired outlet.
If you experience inconsistent flow or difficulty switching, check for debris within the valve or a worn cartridge. Some models may feature adjustable flow restrictors, allowing you to customize water pressure to your preference. However, altering these restrictors can impact overall water pressure. Always refer to your specific Delta valve’s documentation for detailed adjustment instructions.

Troubleshooting Common Issues
Delta diverter valve problems often include low pressure, leaks, or difficulty switching. Identifying the root cause is key for effective repair and restoring optimal function.
Low Water Pressure
Low water pressure with your Delta 3-way diverter valve can stem from several sources, requiring systematic investigation. First, verify that the main water supply to your home is fully open and hasn’t experienced a recent pressure drop.
Next, inspect the valve’s cartridge for debris accumulation – mineral deposits or sediment can restrict water flow. Removing and cleaning, or replacing the cartridge, often resolves this issue. Check the water supply lines connected to the valve; kinks or partial closures will reduce pressure.
Additionally, examine the showerhead and tub spout for clogging. Unscrew and clean these fixtures to eliminate any obstructions. If the problem persists, a partially closed shut-off valve upstream of the diverter could be the culprit. Finally, consider if other faucets in your home exhibit similar low pressure, indicating a broader plumbing issue.
Diverter Valve Leaks
Diverter valve leaks are a common concern, often originating from worn-out seals or a damaged cartridge within the Delta valve assembly. Leaks around the handle typically indicate a loose packing nut, which can be tightened. However, persistent leaks suggest a failing O-ring or cartridge.
Leaks from the showerhead or tub spout, even when the valve is off, usually point to a faulty cartridge that isn’t fully sealing. Inspect the valve body for cracks or corrosion, as these can also cause leaks. Carefully disassemble the valve, examining all components for wear and tear.
Replacing the cartridge is often the solution, but ensure you obtain the correct replacement part for your specific Delta model. Always apply plumber’s grease to new O-rings and seals during reassembly to ensure a watertight connection.
Difficulty Switching Between Spout and Showerhead
Experiencing difficulty switching between the tub spout and showerhead often indicates a problem with the diverter cartridge inside your Delta valve. Mineral buildup or debris can obstruct the cartridge’s movement, preventing it from fully engaging either the spout or showerhead port. A foreign object lodged within the valve can also cause this issue.
Try gently rotating the handle through its full range of motion several times; this may dislodge minor obstructions. If the problem persists, disassemble the valve and inspect the cartridge for damage or buildup. Cleaning the cartridge with vinegar can dissolve mineral deposits.
If cleaning doesn’t resolve the issue, replacing the cartridge is usually necessary. Ensure the new cartridge is correctly aligned during installation to guarantee smooth and reliable switching between the spout and showerhead.

Maintenance and Repair
Regular cleaning and timely repairs are essential for maintaining your Delta diverter valve’s performance. Cartridge replacement addresses wear, while preventative care extends its lifespan.
Cleaning the Diverter Valve
Regular cleaning prevents mineral buildup and ensures smooth operation of your Delta 3-way diverter valve. Begin by shutting off the water supply to the shower – a crucial safety precaution. Gently disassemble the valve components, carefully noting their arrangement for reassembly.
Soak the parts in a solution of white vinegar and water to dissolve mineral deposits; avoid abrasive cleaners that could damage the valve’s finish. Use a soft brush to scrub away any remaining residue, paying close attention to the cartridge and valve body.
Rinse thoroughly with clean water and inspect for any signs of wear or damage. Before reassembling, apply a silicone-based lubricant to the O-rings and seals to facilitate smooth movement and prevent leaks. Reassemble the valve carefully, ensuring all parts are correctly positioned. Finally, turn the water supply back on and test for proper function.
Replacing the Cartridge
A worn cartridge is a common cause of diverter valve issues. Begin by shutting off the water supply and relieving any residual pressure. Carefully remove the handle and trim, then disassemble the valve body to access the cartridge. Note the cartridge’s orientation before removal for correct installation of the new one.
Use a cartridge puller tool if necessary, as cartridges can be firmly seated. Once removed, inspect the valve body for debris or damage. Before inserting the new cartridge, lubricate it with silicone grease – this protects seals and ensures smooth operation.
Align the cartridge correctly and firmly press it into place. Reassemble the valve body, trim, and handle, then restore the water supply. Test the diverter function thoroughly to confirm proper operation and check for leaks.
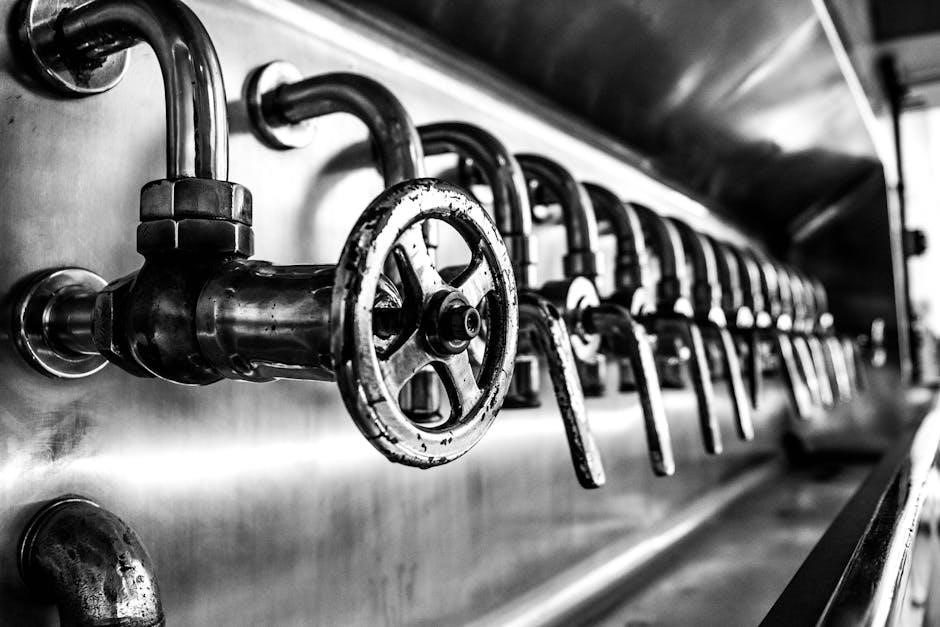
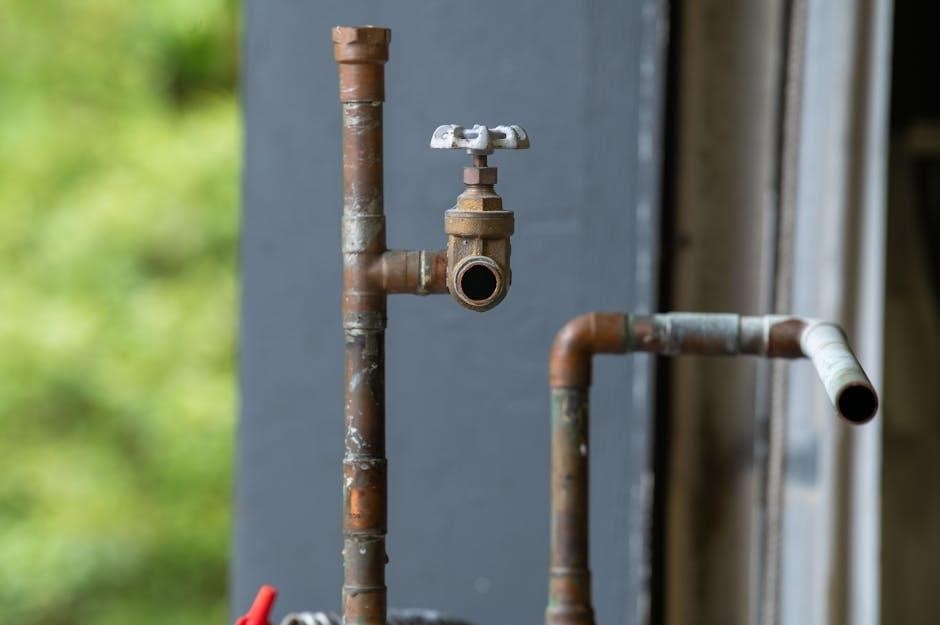
Identifying Delta Diverter Valve Parts
Understanding Delta diverter valve components is key for repairs. Core parts include the valve body, cartridge, handle, escutcheon, and spout. The cartridge controls water flow redirection, while the handle operates the diverter mechanism. The escutcheon covers the valve body, providing a finished look.
Additional parts like O-rings, seats, and springs contribute to leak-free operation. Specific models may include a ball valve or spacer cup. Identifying these parts accurately is crucial when ordering replacements. Referencing a Delta parts diagram (see section Delta Diverter Valve Parts Diagrams) is highly recommended.
Part numbers are essential for compatibility; ensure the replacement part matches your valve’s model; Online resources and Delta’s customer support can assist with identification.

Delta Diverter Valve Parts Diagrams
Detailed diagrams illustrate valve assembly breakdowns, aiding in part identification and understanding internal mechanisms. These visuals are essential for successful repairs and maintenance.
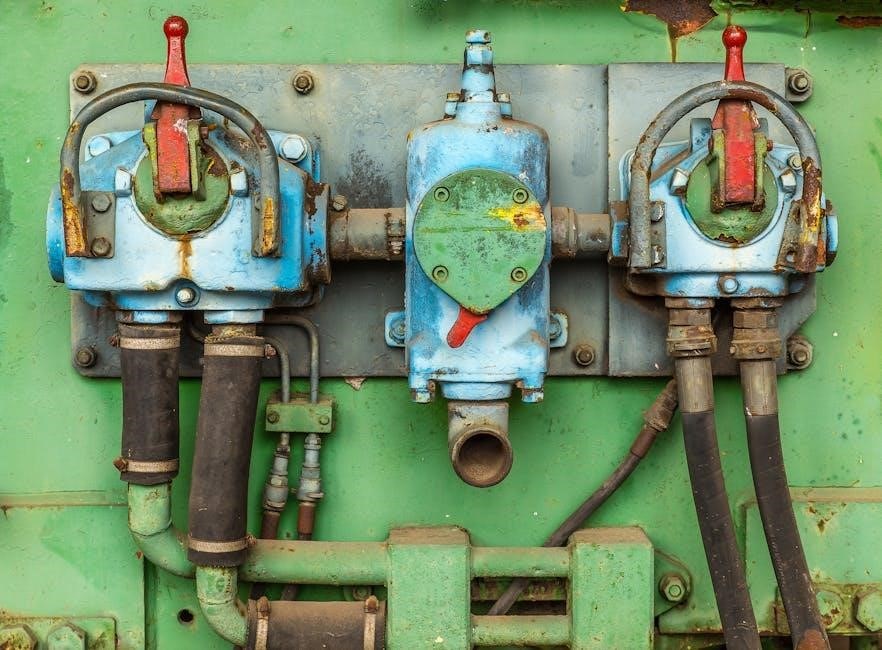
Valve Assembly Breakdown
The Delta 3-way diverter valve comprises several key components working in harmony. The valve body, often constructed from brass, forms the foundational structure, housing the internal parts. Crucially, the cartridge controls water flow redirection, featuring a rotating mechanism to switch between spout and showerhead.
Essential elements include the ball, bushings (like 1/4NPT x 1/8NPT), and spacers, ensuring smooth operation and preventing leaks. The cup and lower body contribute to a secure, watertight seal. Assembly diagrams reveal the precise arrangement of these parts, highlighting their interdependencies. Understanding this breakdown is vital when disassembling for repair or identifying replacement parts, such as the CP17148 valve assembly.
Proper reassembly, following the diagram, guarantees functionality and prevents future issues;
Specific Part Numbers & Compatibility
Identifying the correct Delta diverter valve parts is crucial for successful repairs. Part numbers, like CP17148 for a 3-way valve assembly, are essential for ordering replacements. Compatibility varies depending on the Delta faucet model and manufacturing date; therefore, verifying the specific model is paramount.
Common components, such as cartridges and O-rings, often have multiple compatible numbers. Referencing Delta’s official parts diagrams and documentation ensures accurate selection. Resources like repair manuals (Delta Motor parts manual) provide detailed listings. When sourcing parts, confirm they match your valve’s specifications to avoid fitment issues.
Incorrect parts can lead to leaks or malfunction. Always double-check compatibility before purchasing, utilizing Delta’s website or contacting customer support for assistance.
Safety Precautions

Always shut off the water supply before starting any Delta valve work. Use appropriate plumbing tools carefully, protecting yourself from potential hazards during installation or repair.
Shutting Off Water Supply
Before commencing any work on your Delta 3-way diverter valve, completely shutting off the water supply is paramount for safety and to prevent potential water damage. Locate the main water shut-off valve for your home – typically found in the basement, utility room, or near the water meter. Turn this valve clockwise until it’s fully closed.
Additionally, it’s wise to shut off the individual supply valves dedicated to the bathroom, if accessible. After shutting off the water, open the existing shower valve to relieve any remaining pressure within the pipes. This step ensures a dry working environment and minimizes the risk of unexpected water flow during the installation or repair process. Confirm the water is fully off before proceeding.
Working with Plumbing Tools
Successfully tackling Delta 3-way diverter valve projects requires the correct plumbing tools and a basic understanding of their use. Essential tools include pipe wrenches (various sizes), adjustable wrenches, a basin wrench for tight spaces, a screwdriver set (Phillips and flathead), and Teflon tape for sealing threaded connections.
A tubing cutter is vital if working with copper pipes, while PEX crimping tools are necessary for PEX installations. Safety glasses are non-negotiable to protect your eyes from debris. Familiarize yourself with each tool’s proper operation before starting. Always apply gentle, controlled force to avoid damaging pipes or fittings. Proper tool handling ensures a secure, leak-free installation and prevents injury.